I recently found myself revisiting an old post, Fabulous Fire and the Quantum Karp,and it gave me cause to reflect. The post was made fairly early on in my cloisonné experiments back in April of 2013. I realized as I read that I had posed something of a question to myself. I wrote ” I cannot wait to see what my efforts over the next year will yield if I remain steadfast in my enameling experiments.” And so now, here I am, just over a year into my foray into enamels. So how far have I come? I decided that it deserved review.
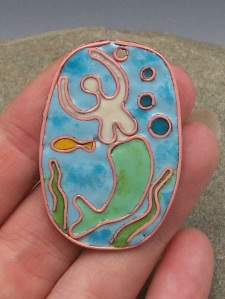
My first cloisonné piece was a mermaid. Why I chose a mermaid I couldn’t say. I really was not a mermaid fan. Didn’t like them, didn’t dislike them, I could take them or leave them. However, over the past year through my enameling, I have become something of a nut for mermaids. My first one wasn’t pretty, but she had BIG boobs! She didn’t have hair. Why? Because I was afraid to try to add hair. I didn’t think I could do it. Keep in mind, I was terrified I wasn’t going to be able to make a successful cloisonné piece to begin with! I just didn’t have the nerve to take on hair too. Have I mentioned that I’m faint of heart? I felt I was being brave enough just going all Hail Mary on a cloisonné experiment I was sure was doomed to begin with, so I just moved past the whole daunting hair issue. I created the design with some scrap 20 gauge copper wire I had laying around. Rough around the edges to be sure. Some people couldn’t even tell she was a mermaid. I was still proud of her. She represented my foray into brave new territory, my pride in being able to move past my fear (no matter how loud that little voice in my head screamed ‘you can’t do this!’) and discover what I COULD do rather than fretting over what I didn’t think I could do. This piece was completed in March of 2013.
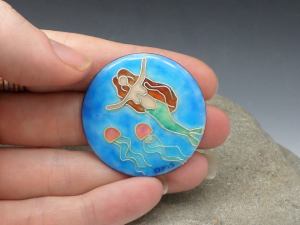
So how far have I come? Pretty far, I think. My latest mermaid even has hair. Yes. I found my courage for that too eventually. 🙂 See for yourself.
Another one of my early pieces that I was proud of was the Quantum Karp. I called him the quantum Karp because I felt that I had taken something of a quantum leap in my cloisonné when I went from my bald, big boobed mermaid to this little guy. I was thrilled with how he turned out. Note that I had a cloisonné wire frame on him as well (just as in the first mermaid). Why? Because I was ever so foolishly afraid the glass would run off of the edges. I laugh about that now, but at the time I was quite concerned. lol
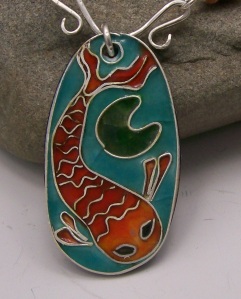
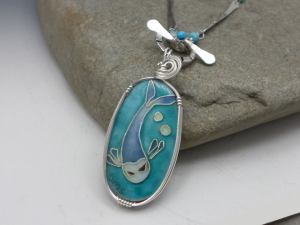
Of course eventually I came around and realized that the glass would not run off of the surface. So to measure progress I share my blue fish. Have my fish evolved? I’m not sure about this one (outside of the fact that the blue fish doesn’t have signs of my silly drippy glass phobia). The truth is that I like them both. My blue fish has less detail in the actual design, but my color shading is certainly better, whereas it was nearly nonexistent in my Koi. What do you think?
As for my beach scenes have come a loooong way. I’m sure you will agree. I look back at my first one and it looks so clumsy, so … I dunno. Ugly is the word I think I’d use. I look at the orange and purple sky, and the blue water, and they two simply aren’t in unison. It’s as if there is a sunset skyline paired with high noon waters. It just doesn’t work for me.
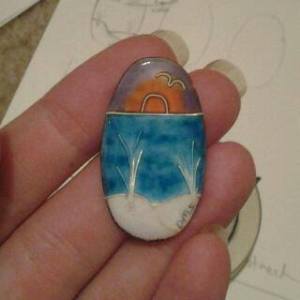
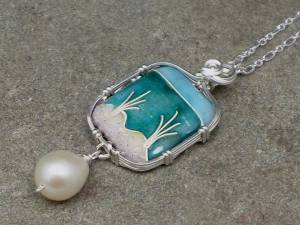
I do, however, love my beach scenes in present day. Not only are they far more pleasing to the eye, I’ve added little slivers of silver foil in the beryl blue waters to mimic movement in the waves and best yet – real beach sand from the gulf coast fired into the sand dunes. Progress is apparent here, in my humble opinion.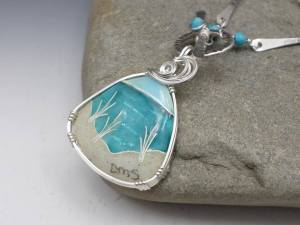
And so, with the year in review I ask myself ‘what will my work look like in 2015? Will I progress? Will I look back at the pieces I am so proud of now and think again how far I’ve come? The only answer I have for that is ‘I certainly hope so’.
___________________________________________________
Get you own mini cloisonné ‘Peace of the Beach’. Now available in my etsy shop: https://www.etsy.com/listing/198904667/beach-scene-cloisonne-enamel-necklace?ref=listing-0
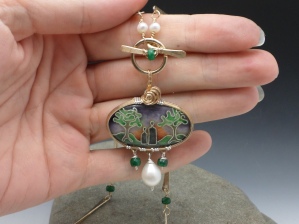
See what else I’ve been up to. Are you a tree fan? I am, and they’re beginning to appear in my cloisonné. https://www.etsy.com/listing/198884770/sunset-valley-handmade-cloisonne?ref=listing-1
https://www.etsy.com/listing/197894888/handmade-cloisonne-autumn-winds-necklace?ref=listing-3


